If
you use multiple USB drives, you’ve probably noticed that the drive
letter can be different each time you plug one in. Read on if you’d
like to assign a static letter to a drive that’s the same every time
you plug it in.
To work with drive letters, you’ll need to use the Disk Management tool built into Windows.
- In Windows 10, click Search, type “create and format,” and then click
“Create and format hard disk partitions.” Don’t worry, you’re not going
to be formatting or creating anything. That’s just how we get to the
Disk Management tool. Windows will scan and then display all the drives
connected to your PC in the Disk Management window.
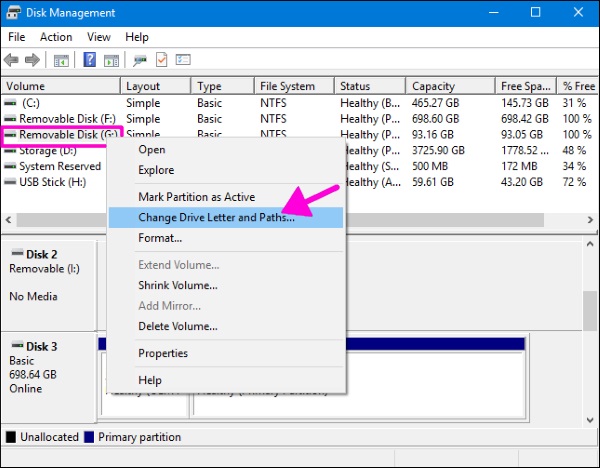
- Right-click the USB drive to which you want to assign a persistent
drive letter and then click “Change Drive Letter and Paths.”
- The “Change Drive Letter and Paths” window the selected drive’s current
drive letter. To change the drive letter, click “Change.”
- In the “Change Drive Letter or Path” window that opens, make sure the
“Assign the following drive letter” option is selected and then use the
drop-down menu to select a new drive letter. When you’re done, click
'OK'. We suggest picking a drive letter between Q and Z, because
earlier drive letters may still get assigned to drives that don’t
always show up in File Explorer. Q through Z are almost never used on
most Windows systems.
Back
in the main Disk Management window, you should see the new drive letter
assigned to the drive. You can now close the Disk Management window.
From now on, when you disconnect and reconnect the drive, that new
drive letter should persist. This comes in handy when running programs
that require a fixed path...